
Here are some of the steps as I did them:
 |
| I sewed two long strips of green and blue together, cut them into 2 ½" wide rectangles, then sewed 2 together to get the checker board effect. |
 |
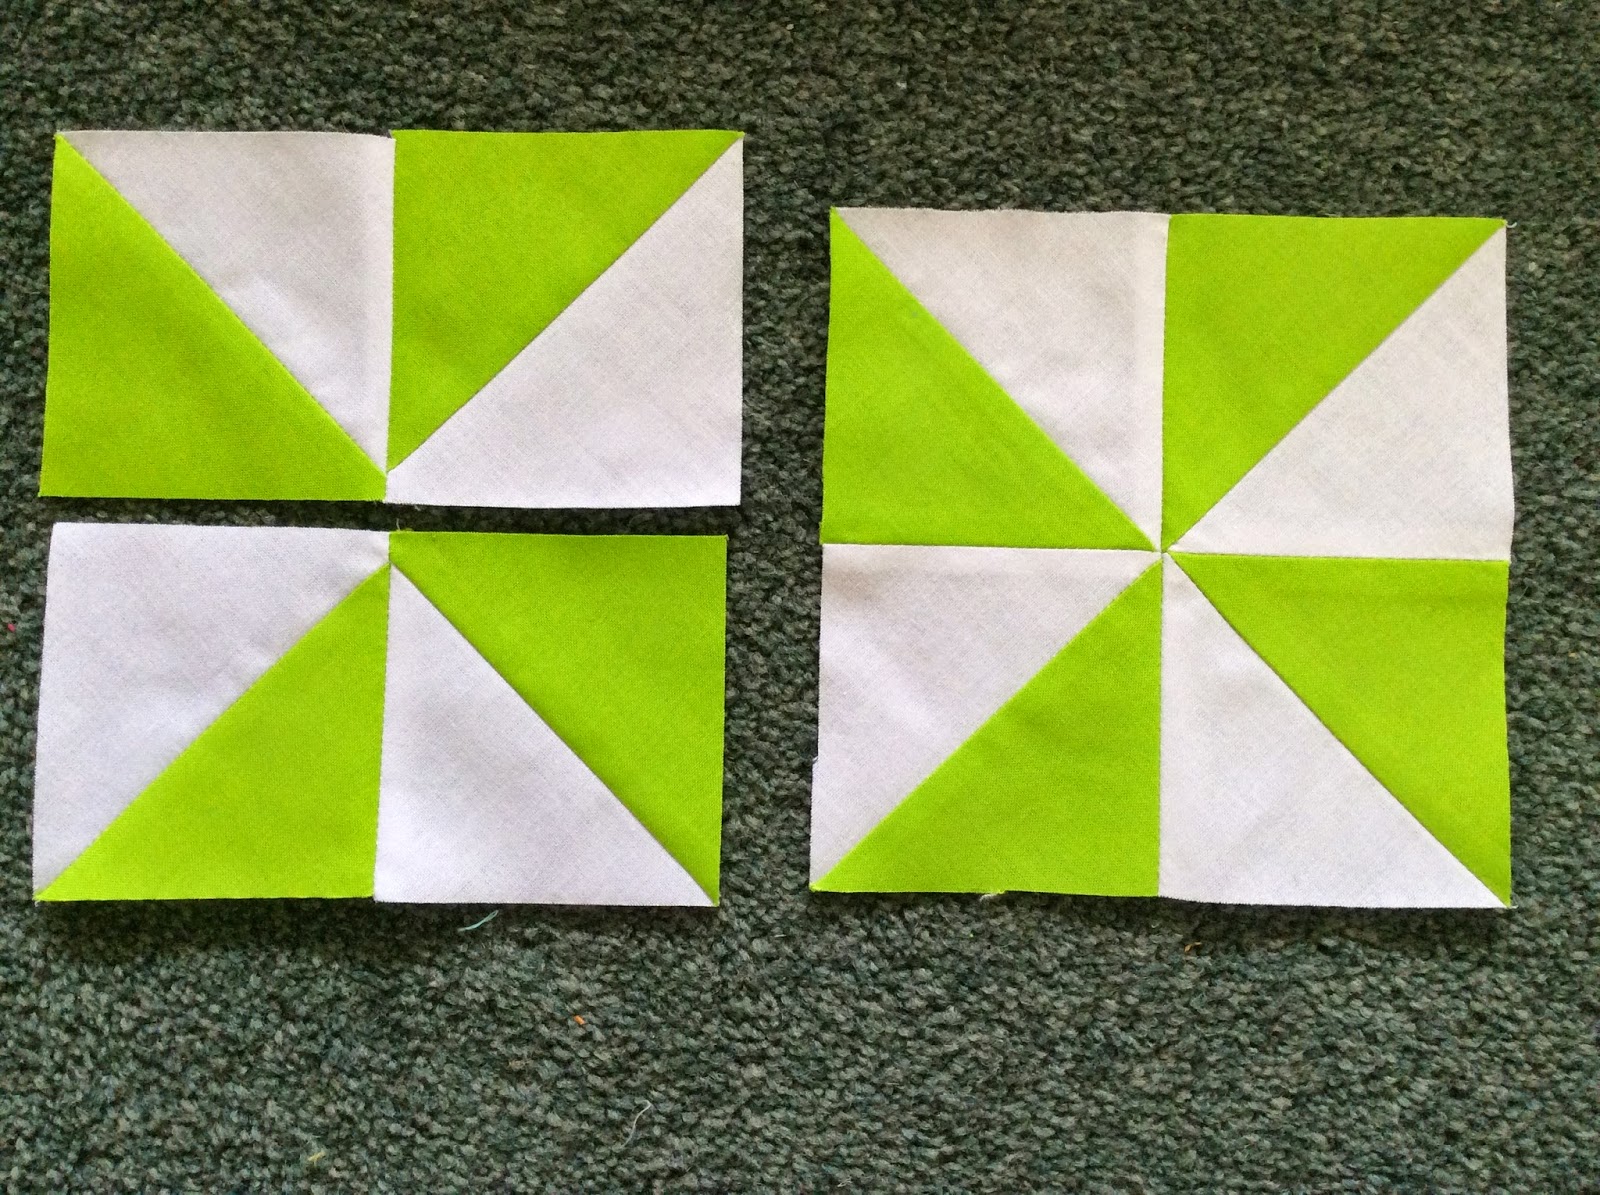
| For the windmill I put two 5" squares together and sewed a ¼" seam around the edge. I then cut the square into rectangles and ironed them open. This forms the pieces for the windmill (so easy!!!). |
 |
| Front and back of 2 halves of a windmill piece |
 |
| Windmill all sewn together |
 |
| I only needed the square to be 4 ½" x 4 ½" so I used the awesome angle mark on my ruler to trim the sides down and keep it a nice square. |
 |
| The kiwi all cut out and ironed down with Heat n' Bond. I wasn't happy with it's placement on the white square so here I am cutting it out to place on another square. Made it all a bit more solid anyway. |
 |
| All sewn down with a very fine zigzag. I wanted to make sure that he wasn't going anywhere! |
 |
| With the windmills sewn in place around the kiwi. Some of those corners were getting quite tricky to sew through with 7 layers of cotton in some places. |
 |
| On the ground before sewing the white strips in place to see how it will look. |

I used a piece of fleece instead of quilt batting as it was cheaper and I think will be a bit snugglier (if that's a word?). The back is plain yellow and I think I'll use either the blue of green for the binding.
Will post a final picture when done.
No comments:
Post a Comment