21 Nov 2013

A 5th birthday party - part 1

My little girl is turning 5 this year. Where has the time gone? Of course this has to big a big party so I had to get started early. 


Thankfully she decided on a mermaid theme early and hasn't changed her mind, so I started with a few crochet creatures to get the creative juices going. 
The pattern was taken from here. I have since added another octopus, another fish and an orca.

The next thing I thought about was the cake. I had seen a few I liked on Pinterest and decided that there would be blue buttercream icing with fondant coral/seaweed on top. I got myself some gum paste mix at Spotlight and had a go at mixing it up. I have never worked with gum paste before but this was pretty easy to make. After last year with the marshmallow fondant I figured this would be a piece of cake, but it's trickier doing 3D shapes. The first lot sank on itself as the mix was too soft, so the next time I used toothpicks to hold it up. I am slowly improving and plan to try a pillow for a little Ariel doll to sit on.
Lots of coral and seaweed
Then I thought I'd better get on to the invitations. I had a pretty good idea of what I wanted and little girl agreed. I wish I had a colour printer here in Perth, but I don't so I had to go old school and draw with a coloured pencil and glue on cut outs.


Chloe wrote the names on Post It notes so mistakes could be easily re-done


Added to the pile was a treasure chest (see top pic) to be filled with chocolate coins. I am also in the process of making scallop shell goodie bags so will post pics when they are done. Only 3 1/2 weeks to go and little boys 3rd birthday the day before, and he has been requesting a dinosaur cake...

6 Sept 2013

Superhero Capes

The kids were playing with blankets making them into capes and I was sad for a moment that I didn't have my sewing machine with me in Perth. Then I realised that I do have a needle and thread and that I am quite capable of hand sewing. So I grabbed out an old satin pillowcase that we aren't using anymore and cut it into 2 capes.
Final cape with initial sewn on the back in plain cotton. I did a blanket stitch around the letter and the circle. It bunches a little at the neck as I didn't do any shaping, but it really doesn't matter.

This is the cut up pillowcase with 3 raw edges. I left the open end with it's sewn edge - this was the top of the cape.

I also left the fold over bit there as I didn't want to have even more raw edges to sew.

I folded over the raw edge and did a large stitch along it to hold it down. I only had white cotton but thought the contrast would be fine (it's just a kids play thing). I sewed velcro on the outside corners for fasteners.

Full shot showing all edges sewn.

5 Sept 2013

Crochet Hootabelle

It took a while but I managed to finish Hootabelle, much to Chloe's delight. The colours are a bit deeper than the original but that was what I had to work with. I don't really want to get a massive stash of wool here in Perth and it is already pretty decent.

I followed the Six Little Mice pattern again, using a picture of Hootabelle to change the colours where necessary. For the headband I just worked a flat band doing sc's back and forth until it was the right length. For the butterfly I followed a suggested page by The Craft Room (she has made very cute Hoot and Hootabelle) at Little Birdie Secrets. It was a bit tricky, especially to add a white sc row around the edge, but it turned out OK. 
So here she is:

The heart dots are glued on felt and lasted all of 30min of being played with so I've left them off.


26 May 2013

Crochet Hoot

I have finished Hoot! Using a pattern from Six Little Mice I whipped him up in no time (well, it actually took a while as the body is 81 stitches around and that's a lot of single crochets). Pretty happy with how he turned out. Next - Hootabelle.

Finished Hoot

23 May 2013

Rainbow Bread

Thank you Pinterest! Another great idea that I could do with my girl. I made rolls instead of a loaf and had to adjust my bread recipe as I had a different kind of yeast, but it still worked great. She took the sandwich to kindy today and I can't wait to hear what the reaction was.

Before cooking. I made a log and cut it into 8 pieces. I then rolled each piece a bit so it looked a little more like a bread roll.

Just out of the oven.

Inside!

Kindy lunch. I sliced the top and bottom off to show off the rainbow.

20 May 2013

Crochet Gizmo

I was inspired by family recently to attempt to make a Mogwai. For those who haven't seen the film 'Gremlins' a Mogwai is a furry little creature that can transform into evil little monsters if you don't follow the rules. Anyway....I couldn't find a good crochet pattern for a Mogwai that I liked. In the end I found a cute picture of one with a partial pattern and I ended up making lots of it up!

I am in the process of typing up the pattern that I made up. I have taken bits from the original, but changed lots as I think mine is a bit bigger than the original. I'll post the pattern when I get it done. 

EDIT: Here is the pattern I used. If you use it in conjunction with the original post it may actually make sense. I apologise if it's hard to read, but this is my first crochet pattern and I am new to amigurumi. If anything doesn't make sense please let me know and I will try to explain. The head is just plain tricky and I did a bit to just make it work. I have tried to add explanations in the pattern too. First time linking a PDF as well so let me know if there are any issues.

Gizmo Crochet Pattern


Finished Crochet Mogwai
Before arms and legs
Back - next time I wouldn't do the white as high up the back

Top

Side/top view to show the hands


8 Apr 2013

Routine Chart

Another awesome idea from Pinterest here. We want little miss to get into a routine for morning and bedtime as things were taking FOREVER to get done (and I mean FOREVER). This way she can see what needs to be done and if she doesn't do it within a reasonable timeframe then she doesn't get to flip the tab up. So far so good. We have needed to make a few adjustments to help with our own expectations but she loves putting the tabs up and she is getting a bit more independent (yay). The little magnets are perfect for re-using every day. I drew the pictures (with a little internet help) and the writing is in the font she is learning at kindergarten.


19 Feb 2013

Butterfly and Monster Party

I'm afraid this is a bit late. In the time after the kids birthday's we went south for Christmas then came home and moved to Perth. I haven't been able to bring all my craft stuff with me so this year might be a little light on posts. I did bring my knitting needles and crochet hooks so I'm sure I can come up with something.

Here are some pics from the Butterfly and Monster party we did for the kids:

Monster Marshmallows, dipped in dark choc and blue coloured white chic, then dipped in 100's & 1000's and candy eyes added randomly.

Brownie shaped into balls, dipped in white choc with dark choc drizzled over the top. I have a foot choc mould that I made the feet with and attached with some more melted chic.

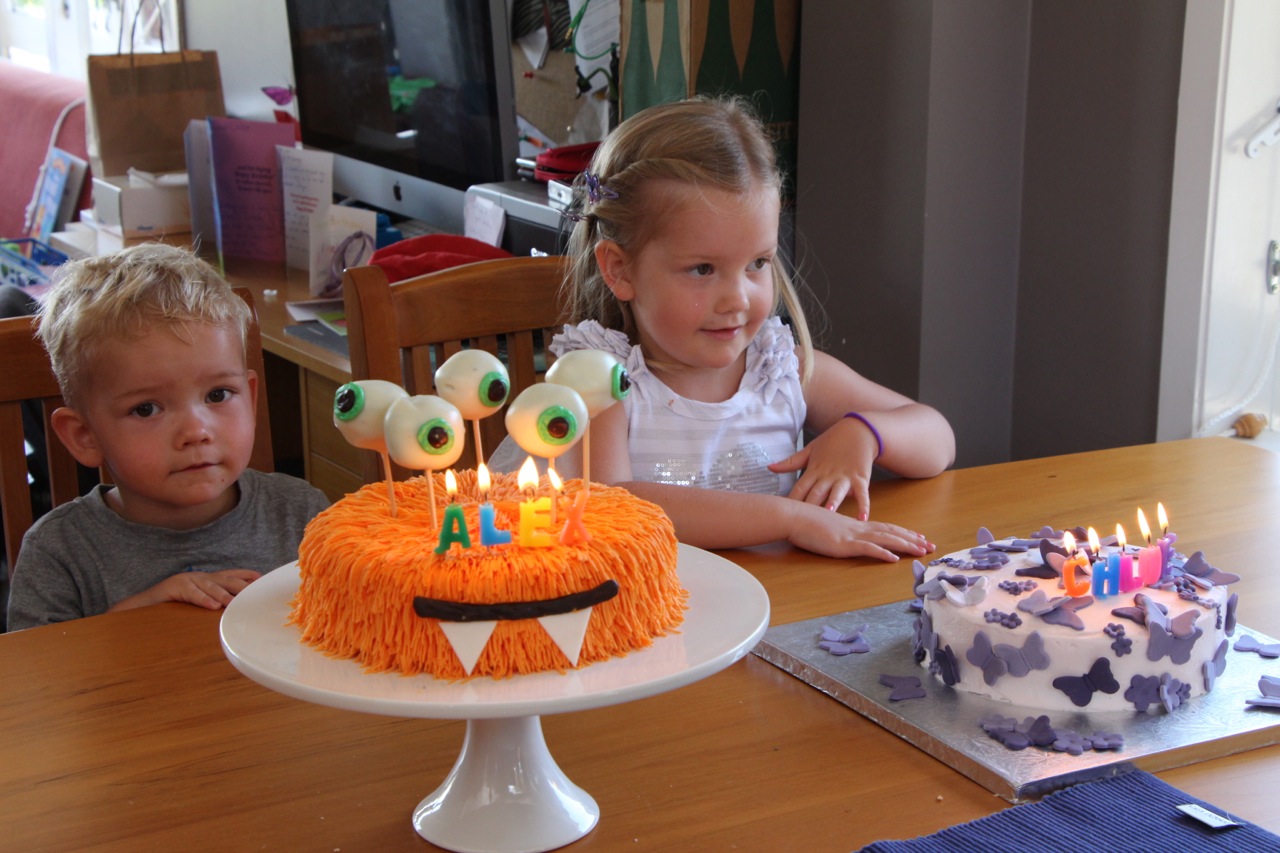
Monster cake - white choc mud cake. The eyes are brownie balls with green icing iris and melted choc dot pupils. The mouth is white choc and the teeth are fondant. Love the multi-nozzle tip for icing 'hair'.
Butterfly cake - choc cake with raspberry buttercream icing. The butterflies were my first attempt at marshmallow fondant and turned out OK (but not fantastic).


'How long until we can eat it!'

Found a butterfly

Looking for more butterflies with her net